Why surface blemishes deserve more than a quick repaint
Most homeowners notice cracked grout or bubbling paint and reach for the closest tube of caulk or a can of primer. That instinct to tidy up is understandable, but covering a symptom without identifying the cause typically means the same problem returns within months, often worse and more expensive to fix.
Surface blemishes in a home fall into two categories: purely cosmetic wear from age and UV exposure, and cosmetic symptoms pointing to an active problem underneath. The difficulty is that both look similar at first glance. The location, pattern, and rate of progression are what separate a harmless scuff from a moisture leak or structural movement.
See our guide to common maintenance myths for a broader look at how first-time owners misread these signals.
The mistakes that turn warning signs into costly repairs
These are the errors homeowners make most often when they encounter the surface blemishes described below. Each one delays the right fix and usually increases the eventual cost.
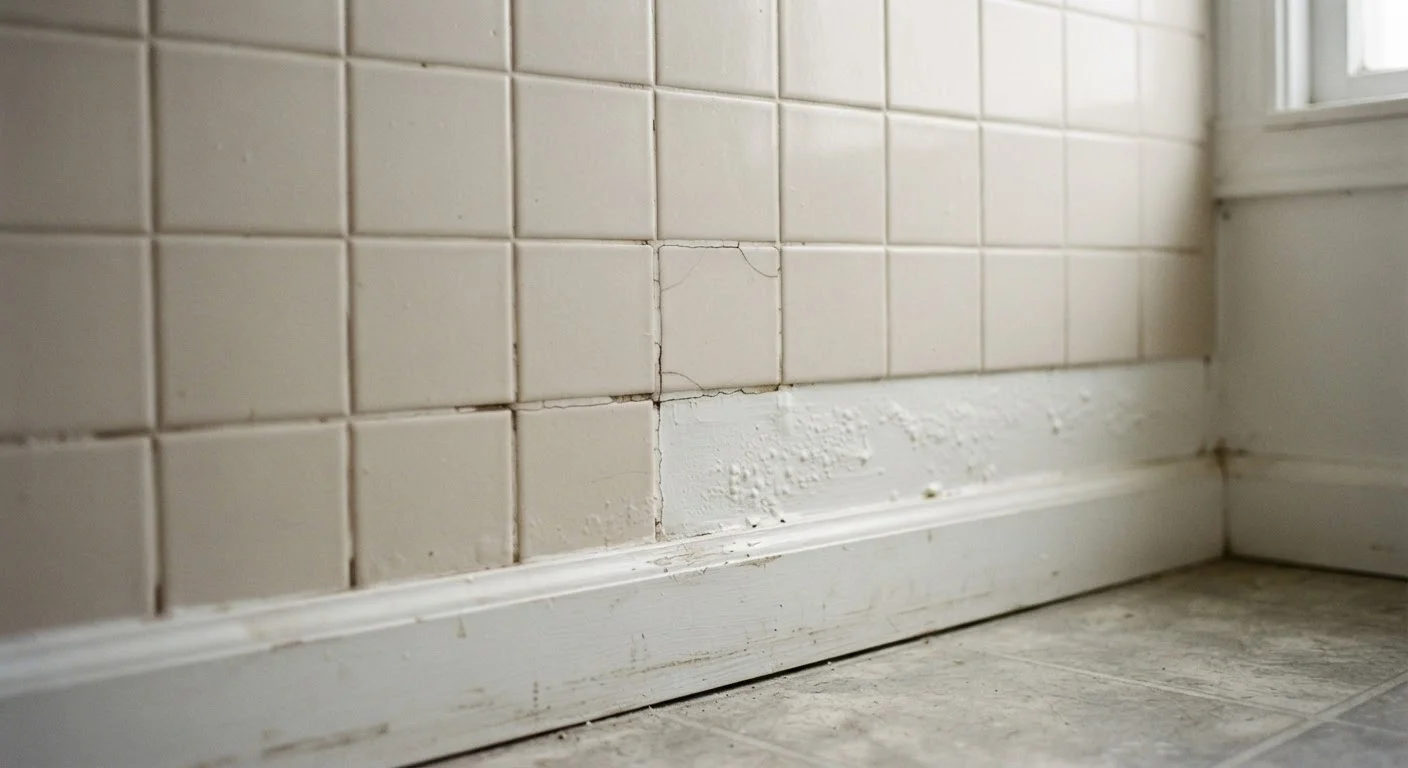
Patching cracked grout without checking for moisture behind the tile.
Why it happens: Grout cracks look like a simple cosmetic fix, and re-grouting is inexpensive and quick. Homeowners rarely consider that the crack may be a symptom of water that has already entered the wall cavity.
Repainting over bubbling or peeling paint without finding the moisture source.
Why it happens: Paint bubbling is often assumed to be an old-paint-adhesion issue, so homeowners sand it down and apply a fresh coat. The new layer peels again within weeks because the water vapor driving the bubbling was never stopped.
Treating all wall cracks as normal settling without assessing the pattern.
Why it happens: Small hairline cracks do appear in drywall as a house settles, so homeowners apply joint compound and move on. The same response gets applied to cracks that are actually structural or caused by water damage.
Ignoring a musty smell near a finished basement wall or crawl space access.
Why it happens: Odors are easy to dismiss or mask with air fresheners, especially when no visible water is present. Homeowners often assume the smell is residual dampness from a past incident rather than an ongoing one.
Caulking over a gap between the baseboard and floor without checking for subfloor softness.
Why it happens: Gaps at the baseboard look like a straightforward caulk job. The underlying cause, often a slow leak from an adjacent bathroom or a failed exterior threshold seal, goes unexamined.
When you are unsure whether a repair is within DIY reach, the framework for deciding when to call a professional can help you assess the risk honestly before starting work.
High-risk locations to inspect first
Not all walls and floors carry equal risk. Certain locations concentrate moisture, movement, and temperature stress in ways that produce visible warning signs earlier than elsewhere in the house.
- Shower and tub surrounds: Grout failure here is the single most common gateway for water into wall cavities. Check grout lines at inside corners and along the tub deck first, since those joints flex with every temperature change.
- Under windows: Paint bubbling or soft drywall below a window frame usually points to a failed seal on the exterior casing or a compromised sill. Water tracks down behind the interior finish before appearing at the baseboard.
- Around toilet bases and under sinks: Soft flooring, discolored grout, or a slight give in adjacent tile rows often indicates a slow supply-line drip or a failing wax ring seal.
- Exterior wall corners inside rooms: Diagonal cracks running from window corners at roughly 45 degrees can indicate differential settling. Horizontal cracks in a basement wall are a different signal and warrant a structural evaluation.
Horizontal foundation cracks need professional review
A horizontal crack in a poured concrete or block basement wall can indicate lateral soil pressure pushing inward. This is different from harmless vertical shrinkage cracks that appear as concrete cures. Do not attempt to fill a horizontal foundation crack with hydraulic cement and consider it resolved. A structural engineer or licensed foundation contractor should evaluate it, as the underlying cause may require waterproofing, drainage correction, or wall reinforcement.
A 10-minute walk-through of these locations every three months catches most problems at their cheapest stage. The 15-minute maintenance routine gives a practical structure for fitting this into a busy schedule.